
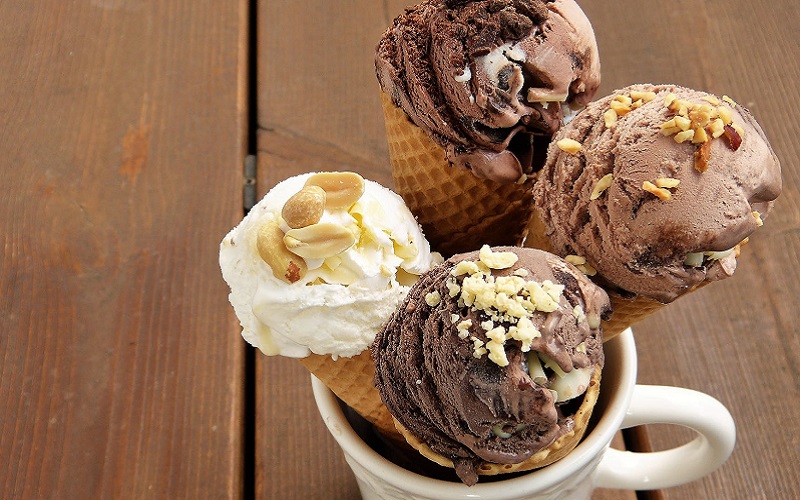
Perfect for the hot summer: Make ice cream yourself – it’s that easy!
Homemade ice cream needs no expensive machine and no pro recipe. With a handful of fresh ingredients and a little patience, you can bring ice-cream-parlour quality straight into your own freezer. Here’s how to do it.
You don’t need an ice-cream maker or a complicated recipe to whip up creamy ice cream. The foundation is just four things: a liquid to carry the flavour, a sweetener, egg yolk for creaminess, and patience while it freezes. Stirring air into the mix every 20 to 30 minutes-even without a machine-yields a light, fluffy result. Here’s the full journey from basic recipe to your own favourite flavour.
- Core ingredients: milk or cream, sugar or honey, egg yolk, fresh fruit or spices to taste.
- No machine? Stir vigorously every 20 to 30 minutes until the mixture is frozen and creamy.
- Heat custard base to 75-85 °C. It’s pasteurised and food-safe from about 71 °C.
- Fresh, unprocessed ingredients make all the difference compared with any ready mix.
- Toppings like toasted nuts, chocolate sauce or a splash of liqueur lift the dessert to restaurant level.
What You Really Need
The most important tip upfront: the ingredients should be fresh and as unprocessed as possible. That’s where success or failure begins. Otherwise, you’ll be surprised how little you actually need.
Start with a liquid-it carries the flavour. Classic choices are milk and cream. If you prefer something lighter or plant-based, almond milk, soy milk, crème fraîche, yogurt, sour cream, or kefir work just as well. Add a sweetener: sugar is the standard, but maple syrup, caramel, or honey lend their own distinct notes. Egg yolks provide the creamy binding that cheap store-bought ice cream often lacks.
For character, use fresh or frozen fruit and nuts. Start with vanilla, cocoa, cinnamon, or coffee for spice. Bolder palates might try chili, lavender, anise, pepper, or ginger. The sky’s the limit-and that’s exactly what makes homemade ice cream so exciting.
Fresh, unprocessed ingredients are the only real difference between artisanal gelato and a bland pre-made mix.
Common Mistakes and How to Avoid Them
Three things often go wrong on the first try. First: too little fat. Swapping cream for skim milk yields hard, crumbly ice cream. Fat is the carrier of creaminess-especially in milk-based ice cream, don’t skimp. Second: not enough stirring. Without a machine, texture hinges on consistently folding in air. If you let the mixture sit untouched for two hours in the freezer, you’ll end up with a block instead of creamy ice cream.
Third: serving too warm or storing too cold. Homemade ice cream lacks stabilizers, so it hardens far more in the freezer than commercial brands. Take the portion out 5-10 minutes before serving; it’ll scoop cleanly and release its aroma. Pro tip: one tablespoon of alcohol or honey per litre lowers the freezing point and keeps the ice cream noticeably smoother.
With or Without an Ice Cream Maker
Both work; the effort differs. Without a machine, prepare the ingredients and chill them in the fridge. Combine everything, pour into a pre-chilled large bowl, and freeze. After about an hour, when the edges begin to set, vigorously stir with a spoon. Repeat every 20 minutes. The regular folding incorporates air, yielding light, creamy ice cream instead of a dense brick.
With an ice cream maker, it’s effortless. Chill the prepared ingredients to about 6 °C, pour into the machine, and let it do the stirring and freezing. Done.
The Basic Recipe: Creamy Vanilla Ice Cream
This custard recipe is the foundation for most milk- and fruit-based ice creams. Once you’ve mastered it, endless variations await.
Heat milk and cream in a saucepan. Split a vanilla pod, scrape out the seeds, and add both to the pan. Warm until nearly boiling, then remove from heat. Beat egg yolks and sugar on high speed until pale and fluffy. Slowly drizzle in the hot cream mixture while continuously mixing.
Now the step that determines creaminess and safety: place the bowl over a bain-marie and heat the custard to 75-85 °C. At this range, the yolks bind cleanly, and the mixture is reliably pasteurised at about 71 °C. Remove from heat, set the bowl in an ice bath, and stir occasionally as it cools. Once cold, freeze, stirring every 30 minutes until fully set. In an ice cream maker, about one hour is enough.
Ice Cream Variations for Every Taste
With the base recipe in hand, you’re free to experiment. Classics like vanilla, chocolate, or strawberry are just the beginning. Frozen yogurt, parfait, a light sorbet, or ice pops follow the same principle with minor tweaks. Hosting guests in summer? Elevate your ice cream to an aperitif by adding a splash of limoncello to lemon sorbet.
Toppings finish everything off: chopped toasted nuts, warm chocolate sauce, crumble, or fresh berries. Try your way through the options-the real joy is in the experimenting. A homemade cool-down always tastes better than anything bought, and it feels that much more rewarding.
For more summer recipes and indulgent ideas, explore our big ice-cream special with additional varieties and the unusual summer cocktails that pair perfectly with a scoop.
Good to Know
▸Can homemade ice cream be made without eggs?
Yes. For egg-free ice cream, increase the cream content or use some crème fraîche or cream cheese for creaminess. Sorbets contain no dairy or eggs at all; here the sugar content ensures the mixture doesn’t turn rock-hard.
▸Why does my ice cream turn as hard as a brick?
Usually it’s missing air or fat. When churning by hand, stir the mixture thoroughly every 20 to 30 minutes and give it plenty of cream or egg yolk. A tablespoon of alcohol or honey also lowers the freezing point and keeps the ice cream softer.
▸How long does homemade ice cream keep in the freezer?
In a tightly sealed container, about two to three weeks. Without stabilizers it loses creaminess and forms ice crystals after that. It tastes best fresh, so make smaller batches more often.
▸Is the egg-based mixture safe for children and pregnant women?
If you heat the custard base to 75-85 °C, it’s pasteurised and safe. Skip raw eggs in cold versions. When in doubt, choose the cooked base.


